US$9.96
Κριτικές πελατών
- Όλες οι κριτικές (74)
- Εικόνα (16)
- Βίντεο (0)
Ταξινόμηση κατά:
Κριτικές μόνο από τη χώρα σας (Greece)
|
Εμφάνιση πρωτότυπου
Ένα μέρος της κριτικής έχει μεταφραστεί αυτόματα.
-
01/12/2020
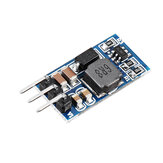
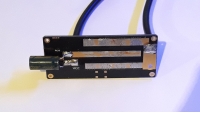
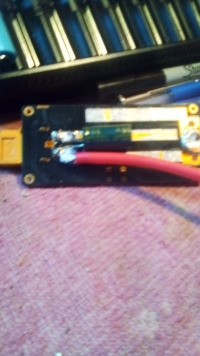
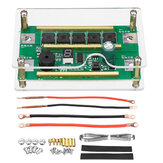
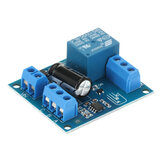
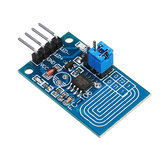
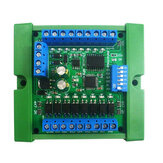
The spot welder works like a charm. Before using, make sure to solder the capacitor to the input of the device. I spot welded a 1.5 mm thick nickel strip with the LVL 3 power (Blue colour). For the best result use a big 4s lipo Battery. I used a 5000 mAh 60C lipo. You need at lease 150A discharge current for the device to work properly (You can calculate the max discharge current by multiplying the capacity with the C rating. For example, if the Lipo has 2000mAh and 100C the calculation should look like this: 2000mAh * 100C = 200A). The cables of the spot welder get a bit warm after a few spot welds on LVL 3 power output. The device should be able to spot weld more than 2.5 mm thick nickel strip with eas. How to use: - Connect the Battery (Obviously) - Press on the button to select your Mode/LVL (I used LVL 3 for a 1.5mm thick nickel strip. Test your welds on two nickel strips) - Press the two pins firmly on the nickel strip. NO GAP should be between the two things you want to spot weld. - When the led flashes up, the spot weld should be done. Congrats you made your first spot weld ;)
Σχόλια (3)Εμφάνιση πρωτότυπου -
06/10/2020
Λειτουργεί καλά, χρησιμοποιώντας 4S μπαταρία λιποαναρρόφησης. όταν χρησιμοποιείται το πρώτο και το δεύτερο επίπεδο ισχύος, η συσκευή και η μπαταρία δεν θερμαίνονται πάρα πολύ, έτσι θα μπορούσατε να κάνετε πολλές οξυγονοκόλληση.
ΣχόλιαΕμφάνιση πρωτότυπου -
24/06/2020
Was great for few test welds and then began to sparks fly from PCB, one small transistor melted and few mosfets went hot and bit smoke. I read one review where was similar case like i have, not sure did we just get bad monday items or what. Small minus, does not contain any instructions, for example what led colors means would be great.
Σχόλια (3)Εμφάνιση πρωτότυπου -
 paulVIP3GB12/06/2020
Δεν είμαι ευχαριστημένος με κάτι που κανείς δεν ξέρει πού να το συγκολλήσει! Τελικά το κατάλαβα, δούλεψε τέλεια την πρώτη φορά και μετά έκαψε 2 φορές την δεύτερη προσπάθεια!
ΣχόλιαΕμφάνιση πρωτότυπου -
JamesVIP3US01/08/2020
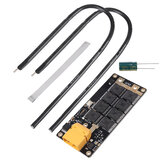
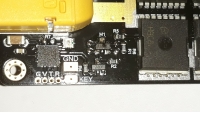
Seems to do what I need done using the Red and Green settings. Purple BLOWS holes in 18650 cells. LOL Bet folks would be willing to pay a extra dollar for documented instructions ? I located the Cap on the underside.
ΣχόλιαΕμφάνιση πρωτότυπου -
05/11/2021
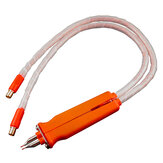
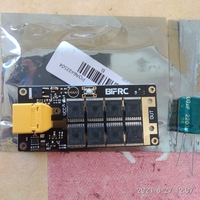
Αγαπητέ κύριε, έχω παραγγείλει στιγμιαία συγκόλληση PCB και στυλό αλλά έχω λάβει μόνο στυλό συγκόλλησης. Τι μπορώ να κάνω τώρα;
ΣχόλιαΕμφάνιση πρωτότυπου -
BrakulVIP3DE16/01/2021
Sehr gute und günstige Lösung, durch die Möglichkeit die Schweißzeit einzustellen lässt sich die Leistung gut regulieren. Der strom lässt sich über den Ladezustand der Akkus und der Kapazität/c raten beeinflussen. Was am Anfang etwas probieren erfordert. Am besten erstmal nur die Nikelstreifen verschweißen da bei zu höhen Einstellungen die zu verscheschweißende Zelle beschädigt werden kann.
ΣχόλιαΕμφάνιση πρωτότυπου -
 06/08/2020
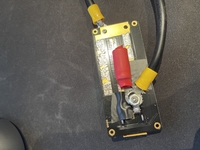
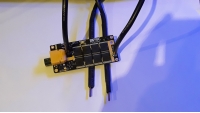
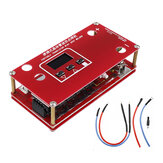
This board is very nice, and works quite well. So far very happy with this board. The mounting holes are very small. The positive is a 2mm hole, and the negative is 3mm. I made a brass extender for the positive on my Mini Lathe. Used a 3mm brass riser and turned down the 3mm screw end to 2mm to fit the hole on the board. I then soldered this to the board, so I had a 3mm location to mount the positive connection. I had some welding tips from another board that failed, So I used those. Had to use large washers to allow a 3mm hex head to fit. As the mounting the Capacitor, I had to look at another review to see how it was done. Seems to work. It's soldered to the bottom, plus to battery positive, and minus to battery negative. The operation is simple. It only gives one pulse when the green LED blinks. The plus length for the RED setting is 10ms, and goes up 10ms for every press of the button. So the plus length is 10ms to 70ms in 10ms steps. I use a 5000mAh S3 Lipo that is at 11.3v. And it takes the full 70ms pulse to do a good weld with 0.2mm nickel strip. The board does not even get warm when welding. I'm sure I'll have to adjust if the battery is at a higher charge. If you use a 4S you may have to use the low settings.
ΣχόλιαΕμφάνιση πρωτότυπου -
27/08/2021
Το προϊόν ελήφθη. Φαίνεται εντάξει όπως πάντα. Δεν έχει δοκιμαστεί ακόμα. Ευχαριστώ.
Σχόλια (1)Εμφάνιση πρωτότυπου -
24/06/2021
Αγοράζω πλακέτα και στυλό, αλλά μου στέλνεις μόνο ένα στυλό συγκόλλησης
ΣχόλιαΕμφάνιση πρωτότυπου


Show:
Ίσως σας ενδιαφέρει
-
 US$48.50
 -
US$20.44
-
US$11.49
-
US$11.99
-
US$11.99
-
US$8.45
-
US$5.99
-
US$37.99
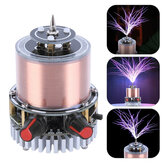
Maxgeek SSTC Mini Μουσικό Διπλό Class-E Solid State Bobίνα Tesla Τεχνητό Εκπαιδευτικό Εργαλείο
-
US$14.99
-
US$16.16
50 τεμάχια. Geekcreit® DC 5V 3MM x 10MM Πίνακας LED SMD WS2812B με ενσωματωμένα κυκλώματα-WS2812
-
US$61.99
-
US$4.59
-
US$4.59
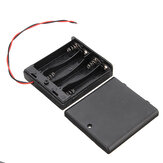
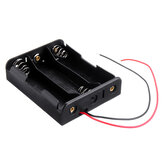
Κουτί μπαταριών με 4 θεσεις AA και διακόπτη για 4 μπαταρίες AA - σετ DIY
-
US$5.74
-
US$49.44
-
US$6.99
-
US$16.99
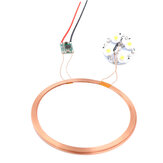
Ασύρματη Μονάδα Τροφοδοσίας DIY Ασύρματης Τροφοδοσίας 120mm DC εύρους για Ηλεκτρονικό Φωτισμό
-
US$8.61
-
US$29.19
-
US$10.15
-
US$12.99
Ασύρματη πηγή ισχύος μακρινής απόστασης 0~80mm Ασύρματη πηγή ισχύος για λάμπα Πηγή ισχύος 5V
-
US$6.89
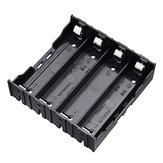
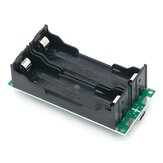
Θήκη πλαστικού κιβωτίου αποθήκευσης μπαταρίας 3 Slots 18650 για 3*3.7V μπαταρία ιόντων λιθίου 18650
-
US$8.99
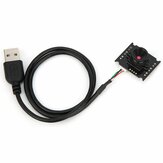
Προσαρμοσμένη έκδοση του αισθητήρα φωτογραφικής μηχανής HBV-W202012HD USB χωρίς φίλτρο
-
US$191.58
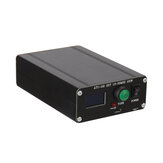
Πλατφόρμα ραδιοφώνου HackRF One PortaPack H2 MINI SDR Πομποδέκτης Αναλυτής φάσματος
-
US$8.73
-
US$159.99
-
US$24.24
100 τεμ Geekcreit® DC 5V 3MM x 10MM WS2812B Πίνακας SMD LED Ενσωματωμένο IC-WS2812
-
US$15.55
-
US$4.99
Ισχυρό ηλεκτρονικό CD74HC4067 Πλακέτα PCB πολλαπλασιαστής αναλογικού ψηφιακού σήματος 16 καναλιών
-
US$5.99
Πίνακας προστασίας μπαταρίας 18650 Li-ion 14Ah 22.2V για PCB BMS
-
US$6.59
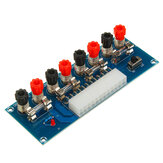
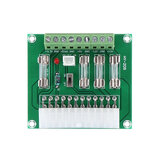
Πλακέτα προσαρμογέα τροφοδοτικού ATX Power 24 pin 5A USB για αξεσουάρ ηλεκτρολογικού υπολογιστή
-
US$18.99
-
US$17.99
-
US$44.84
-
US$6.99
Προσαρμογέας Τροφοδοτικού Υπολογιστή ATX Πλακέτα Μεταφοράς Πρίζας Επέκτασης Προσαρμογέα Τροφοδοσίας
-
US$6.99
-
US$11.99
-
US$25.11
-
US$10.91
-
US$28.99
-
US$10.34
-
US$4.99
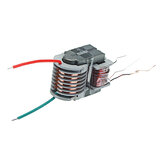
15KV Υψηλής Συχνότητας Μετασχηματιστής Υψηλής Τάσης Ενισχυτής Πλάσματος Αύξησης Πηνίο
-
US$48.59
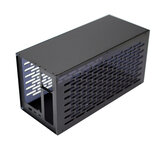
Για το Thunderbolt GPU Dock TH3P4G3 Μεταλλική Θήκη Βάσης γραφικών για ATX/SFX
-
US$9.99
-
US$12.47
-
US$59.99
-
US$10.99
-
US$38.84
-
US$9.19
-
US$10.99
Ανεμιστήρας ψύξης Raspberry Pi, καθαρός χαλκούς, ψύκτης για Raspberry Pi 5


recommendation for you
-
US$9.99
-
US$6.92
-
US$6.99
-
US$23.69
-
US$5.59
-
US$6.99
-
US$3.44
-
US$62.36
-
US$6.99
-
US$11.49
-
US$13.99
-
US$16.99
-
US$2.99
-
US$18.99
-
US$49.99
-
US$23.74
-
US$12.59
-
US$10.99